
For a better understanding, the below article covers the resolutions related to QuickBooks. Learn how to troubleshoot the QuickBooks error could not connect to the email server this can occur when using webmail.
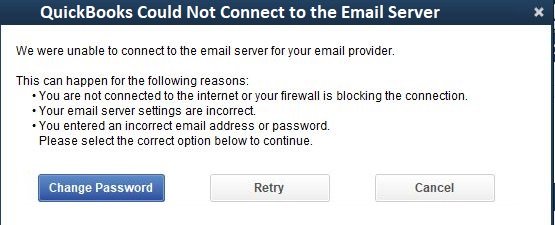
You get the following error message.
Couldn’t connect to email server: We were unable to connect to the email server for your email provider
or
QuickBooks was unable to send your form.
QuickBooks email server error comes on the screen when the user is using the webmail in QuickBooks. The user gets the below message after entering the user name and password.
- You might enter an incorrect email and password.
- Email server settings are incorrect.
- You are not connected to the internet or a firewall is blocking the connection.
Causes for the QuickBooks Could Not Connect to the Email Server
Explores the common causes behind the QuickBooks error could not connect to the email server issue.
- Internet connection is poor.
- Enter the wrong credentials.
- Misconfiguration of QuickBooks email server setting.
- Improper Internet Explorer setting.
- QBDT program has not been updated to the latest release.
- Maybe QuickBooks does not have admin rights on Windows.
Methods to Troubleshoot the QuickBooks Error Could Not Connect to the Email Server
However, there could be many solutions but below are some recommended solutions given to troubleshoot the QuickBooks error could not connect to the email server.
Step 1: Update the QuickBooks to the Latest Release
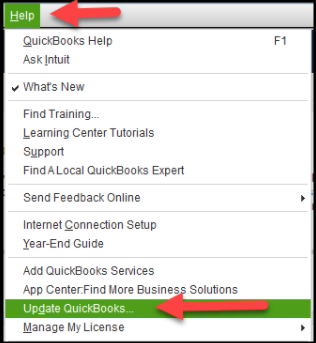
- First of all, Go to the Downloads & Updates page
- While updating select the correct product, if it is not selected visit the option “Change link” and then select the “QuickBooks Product” option.
- Next, select the update button which downloads the update file.
- Finally, select Setup automatic updates that set the QuickBooks automatically download and latest install updates.
Step 2: Reset Internet Explorer Settings to its Default
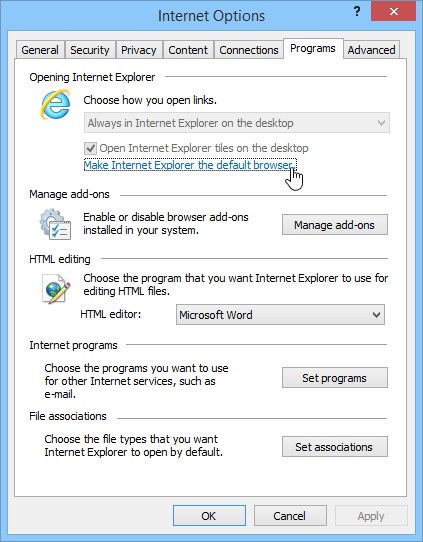
- First of all, open Internet Explorer and, then press Alt +T which opens the tools menu, or you can also open the gear icon
- Select Internet options now
- Go to the Advanced tab >>> Restore Advanced Settings
- Finally, select OK and close the browser.
Step 3: Check the Settings in the Webmail Preferences
- Open the QuickBooks software and select the option “Preference” available under the Edit menu.
- Now, on the left side select the “Send forms option“.
- Select the email account under the option “My preferences” which is being used >>> select the Edit option.
- Go to “edit email info screen” >>> “SMTP Server Details“
- Click on “Settings the server name and port” which is available in email provider settings.
Even, after following the above steps user can get some errors, in that case, you can act according to the error message.
| Error Message | Solution |
| Email server settings are not correct | Try the steps mentioned in Method 3 |
| Entered the incorrect email address and password | In this scenario, the user is required to log the email through the web browser and check if the email and password are working fine |
| You are not connected to the internet or a firewall is blocking the connection | Try to open Internet Explorer and after that try to access the website |
Hopefully, the above steps to resolve the QuickBooks error could not connect to the email server helped you. For any guidance, feel free to connect with the QuickBooks error consultant. The team is available 24*7 to assist you in all the scenarios related to QuickBooks. All the team members are certified, experienced, and have the deep knowledge to resolve the issues quickly.