Looking for import sales receipts processes, no need to worry. This blog post conversation about QuickBooks import and export and how to “import Sales Receipts into QuickBooks online”.
So, you can easily import the sales receipt into QuickBooks and get a clear vision of all receiving payments (including date and time).
Important Things, You need to Know
- Sales receipts are easily imported within multiple line items or as a total value for every invoice
- Make sure about multi-currency is supported.
- VAT codes are required to be mapped so you need to make any new changes to VAT codes to the QuickBooks Vat code format file before importing.
- It is recommended to not import more than 100 sales receipts at once.
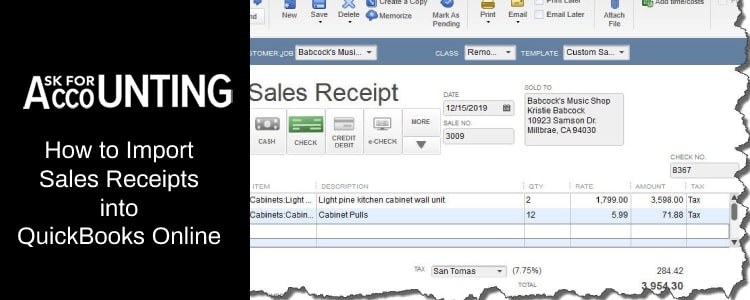
How to Import Sales Receipts into QuickBooks Online
Follow the mentioned steps to import sales receipts into QuickBooks Online.
Step 1: Go and Open the Import Sales Receipts tool
- Go to the “Gear” icon
- Now, open the “Tools” section and click on the “Import Data” button
- Then, choose the Import Sales receipts
Step 2: After the above Step, the user is Required to Upload the CSV File
Before heading to this step, ensure the requirements to import sales receipts
- Click on the Mandatory fields and enter all required data
- Now, the user has to create any line items or new customers
- At last, check and verify the applicable options and choose NEXT
Step 3: Create Maps Columns Headings
- Check, that all mandatory fields are marked with an asterisk (*) sign and other sections have the choice to fill
- The next thing you have to do to choose the date format from the available options
- Choose the VAT option if it is accessible; Inclusive or exclusive. This option is not visible if your QuickBooks set up not done properly
- Go to the final mapping page
- Then map your VAT codes to your QuickBooks
- Hit the click on the Next button
- Then, you can easily find all mapping issues
- Go back to the previous window to resolve all issues for further processing.
Step 4: Now, You are all Set to Import the Sales Receipts
- Once you are done with mapping then you will get access to view the summary of imports as appeared
- Click on the “Start Import” button and then the import procedure will begin
- Wait until the process is not completed, then the import summary will pop up on your screen
- If you find any issue with sales receipt while importing then click on the “All Done” option
- And then you will receive a complete finalized summary
- Click on the OK button to finish the program
Small Guide that will Help You to Create an Accurate Mapping
| QuickBooks Section | Organization Importer Identity | Description |
| Document Number | Sales Receipt Number | Reference Number for all transactions |
| Customer Reference | Customer Name | Name of the Customer in the given field. It’s mandatory to display |
| Shipping Address (Including Bill) | Billing Address Line 1 | First-line address given a limit of up to 500 Characters |
| Billing Address Line 2 | Second-line address given a limit of up to 500 Characters | |
| Billing Address Line 3 | A third-line address is given up to 500 Characters | |
| Billing Address: Enter your city in the given field | Limit up to 255 Characters | |
| Billing Address: Enter the shipping region | Limit up to 31 characters | |
| Country: Fill your Country name in the given section | Limit up to 255 Characters | |
| Postal Code: Enter your Postal Code | Limit up to 255 Characters | |
| Bill in Email | Billing received by email | Recognize the email address where you can send an invoice. Email billing address required up to 100 characters |
| Email Status | Email status update all details | Receipt Email status and Valid values settings update |
| Customer Memo | Customer Memo | User-entered update to the customer, this message is applicable for end-users only on the transactions. The limit is up to 1000 characters. |
| Department Reference | Location | Find the transaction location according to utilizing the location tracking in the QuickBooks online and provide the name |
| Sales Receipt latest update | The app will automatically locate sales receipts including the same sales number and update you | |
| Line | Line: Amount | Identifies the amount of the line |
| Line: Description | It’s about the text description of the line item that pops up in the printed record. Limit up to 4000 characters | |
| Line: Item Name | Need to provide a reference to a specific item but make sure only its name | |
| Line: Quantity | Number of items for a specified line | |
| Line: Sevice | Required to update the date when your service runs. Change and choose the default date format. | |
| Line: Tax Code Name | Need a reference to the tax code for the selected item including its name. | |
| Line: Unit Cost | If you preferred for unit cost, the financial value of the cost or product is presented in the home currency. | |
| Line: Class Identity | Provide a reference to the specified class | |
| Line Discount Account | Account through which the due amount is reduced | |
| Private Note | Private Note | |
| Shipping Date | Shipping Date | Delivery Date for goods or services. The choice to change the settings as per your according |
| Shipping Method Reference | Shipping Method selected process | Provide a reference to the shipping method which is linked with the transaction |
| Tracking Number | Tracking Number | The shipping team provides a tracking number to track the current update of your goods or services |
| Deposits to Account Reference | Deposit into the Account name | Asset the accounts where your payment money is deposited when you don’t specify the account to your undeposited fund’s account. |
| Payment Method Reference | Payment Method process | Provide and check the reference identity to the payment method |
| Payment Reference Number | Payment Reference Number | Reference identity of the received payment |
I hope the above-mentioned information was useful for you to know about “How to import sales receipts to QuickBooks online” and how to record sales receipts in QuickBooks, it will help you to share your data with other clients.
If you find anything more you want to know or need any kind of assistance, you can connect with our QuickBooks Consultant with Live Chat or Email. More questions are resolved on your first call within a minimum time.
FAQ’s
-
What are the Basic Components Receipts Required?
Name and address of the business, Payment date, name and of the person who attempted the payment processing, receipt number, the total amount paid, description for the paid amount, and how you can make your payment (Via Credit card, debit card, cash, etc.), and all required details updated you to fill to proceed for further processing.
-
What is the Finest use of Sales Receipts in QuickBooks Online?
QuickBooks sales receipt comes with many beneficial opportunities but the best one is when you receive the payment for which an invoice has not been approved. It helps you to know about the receiving payments for all outstanding invoices. It is the best way to control your business.
-
How can I Convert a Sales Receipt into an Invoice?
There is no way to convert the sales receipt into an invoice. To do this, first, you need to delete the sales receipt and enter your invoice. Then you get access to apply the payment to the invoice.