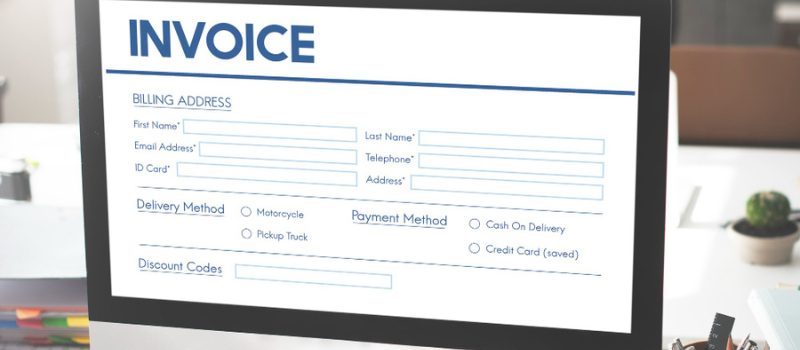
In this article learn how to Import Invoices into QuickBooks Desktop and Online. You are all set to dive into QuickBooks. Right? Of course, being the best accounting software solution, nothing could be as better as QuickBooks for you to upgrade. As a business owner, you need to generate invoices on time to receive the payments on time. This is where having your database maintained with QuickBooks becomes a blessing.
The software tool offers an organized platform to store and retrieve information. Thus, you must know the process of importing the invoices to QuickBooks as soon as you are ready to use the latter for tracking your business transactions.
How to Import Invoices into QuickBooks Desktop
You can import data invoices with multiple line items or as an altogether figure for every single invoice to be generated. In case, there is no line item, the software will fill the field with a generic value i.e. Sales.
Method 1: Reserve the Invoice Number on the CSV File
When the Line Items are present, the first step is to make sure the invoicing number on the CSV file is retained. To ensure this, confirm that the Custom Transaction Number is ON.
A. Check the settings
- At the top, choose the Gear Icon
- Select Account and Settings
- Click on the Sales tab
- Move to Sales Form Content
- Click on the Edit option
- Tick the checkbox and change the status of Custom Transaction Numbers from OFF to ON
- Click Save.
B. Import Now
- At the top, choose the Gear Icon
- Click the Tools option
- Select Import Data
- Choose Invoices or Bills from the list
- Click on Browse
- Select the Excel file to be imported
- Click Open then Choose Next
In case you wish your software to auto-create contacts or other variables, select the applicable options
- Click Next
- Map the headers
- Click Next
- Map your VAT codes if your business organization is VAT-registered
- Click Next
- The summary of your import appears on your screen. Select Import.
Method 2: Steps to import invoices to QuickBooks Desktop
When you receive a third-party application from your client in the form of access to an Intuit Interchange Format (.IIF) file, the import process is simpler. Here are the steps to be followed:
- Sign in as an Admin to the company file.
- Select the File option from the menu.
- Click Switch to Single-user Mode.
- Go to the File menu again.
- Choose Utilities this time.
- Click on Import then Select IIF Files
- Search for the .IIF file.
- Click Open and then OK.
Though the steps are already discussed clearly, there are chances of you having queries related to the same. If face any issues, click here to fix the Import IIF file error in QuickBooks.
May be useful- Transfer Invoices from One QuickBooks to AnotherHow to Import Invoices into QuickBooks Online
In this section will tell you how to Import Invoices into QuickBooks Online. So, without any hassle, you can import invoices to share your work with your employees. Follow the mentioned steps to import invoices into QuickBooks Online.
Step 1: Check and Ready Your Spreadsheet
- Before heading towards importing invoices, ensure that everything is correct in your spreadsheet
- Enter all required details in the given section such as Invoice number, due date, item amount, item tax code, customer, and item tax code.
- In case, if invoices have multiple line items then the user has to be sure that every line entry comes with an invoice number, invoice date, and customer same in the sample spreadsheet.
- If you calculate the taxes then just need to add the tax rate to the invoices of your spreadsheet.
- While processing the importing, the user needs to make a map for the tax codes that you already created in the QuickBooks tax codes.
- After this, you can map every column which is heading towards the invoice fields while importing process takes place.
- To avoid mistakes, you have to check the “What’s needed to import invoices” or “Download the sample spreadsheet”
- If you find any new data then make sure you update all details about the services, vendors, or customers before proceeding with the import procedure.
Step 2: Switch to Custom Transaction Numbers Mode
- To track the invoices, if you utilize the numbers, then you need to turn on your custom transaction number.
- If you are unable or forget to turn on this feature then QuickBooks automatically number the invoices for every individual.
- In the first step, open the settings menu
- Choose the Sales tab
- Hit the click on the “Edit” button
- Go to the “Sales” from the content section
- Now, you have to choose the Custom Transaction Numbers
- At last click on the Save button to finish the process.
Step 3: Upload the Spreadsheet Accurately
- The user is required to update the spreadsheet to begin the importing process
- Choose Invoices
- You have a choice to enter new customers under the browser button. This step is optional.
- Moving forward and choose the browser
- Then locate and choose the spreadsheet of your invoices
- Chose the Next button to do with this step.
Step 4: Map the Import Fields
- After following all the above steps, map the import fields. Check and must be sure about the spreadsheet’s column match with your QuickBooks fields.
- Firstly, you need to map the headers with invoice fields in QuickBooks. Required asterisks (*) in the given fields
- Choose the “Not Applicable” option for any field
- In any case, if a product or service is not available, then QuickBooks Occupy itself with a generic item known as “Sales”
- Choose the date format your according
- Hit the next click on the “Exclusive or Inclusive” according to your tax option
- Click on Next and you are all done with this process.
Step 5: Now, You are all set to Import Invoices
- After mapping the fields, check the summary of your import.
- Ensuring about all things, click on the “Import” button. Once you are done with the process
- Click on the OK button If invoices are imported
- If you find any difficult to import then click on the why option
- Agree with the displayed instructions and click on Done
- In a while, all data is imported and you are all done with this processing.
Import Multiple Invoices at Once in QuickBooks Online
- Before importing multiple invoices into QuickBooks, make sure to take a few things into account and fill out the following columns.
- Invoice number
- Customer
- Invoice date
- Due date
- Item amount
- Item tax code
- In case you collect taxes then you have to add the tax rate as well into the spreadsheet. Then you have to map the tax codes into the QuickBooks tax codes.
- Now you have to go to Settings in QuickBooks, then you have to select Account and Settings.
- Then you have to select the Sales tab and then click on Edit from the Sales for content section.
- Now you have to click on Custom Transaction numbers and then finally you have to click on Save and then Done.
- After completing, you have to click on Settings and then you have to select Import Data.
- You have to now click on Invoices and then you have to map the column headers with the QuickBooks Invoice field.
- Then you have to choose Not Applicable if any field that is not applicable in your spreadsheet.
- Now you have to choose the date format and then you have to click on Exclusive or Inclusive as the tax.
- Click on Next and then you have to Review the summary.
- When the QuickBooks invoice import process is complete, you have to select Start Import and then click OK.
Hopefully, the above-mentioned data was enough to Know How to Import Invoices into QuickBooks online. All these advanced features of this accounting software are at the top pedestal of accountancy management across the world. While QuickBooks importing and exporting, if you face any sort of issue, then dial QuickBooks consultant. The team of QuickBooks experts provides 24/7 online services to resolve your all issues/queries.
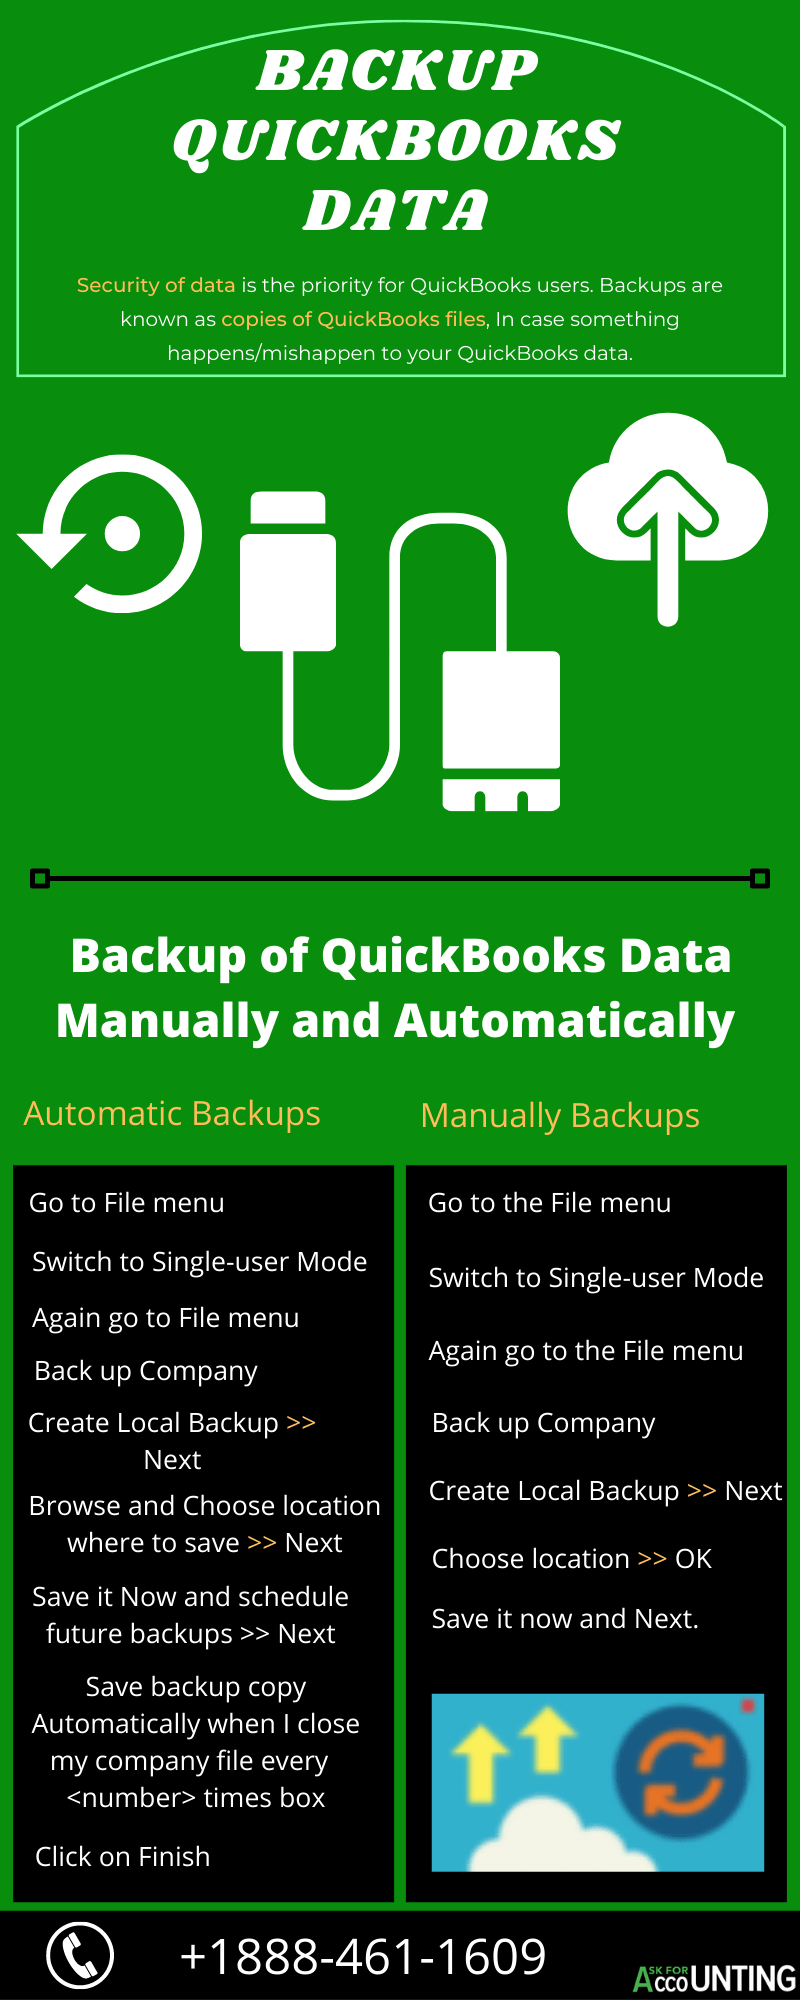
If you’re like most business owners, you want to ensure that your finances are always safe and accessible. One way to do this is by using a backup system for your QuickBooks files. Using a reputable backup company, you can rest easy knowing that your important data is always protected.
Frequently Asked Questions
How would I add Multiple Invoices in QuickBooks?
● Choose the Sales menu and select the “All Sales” tab
● Mark the checkboxes for selected transactions that you need to email or print
● Hit the next click on the “Batch Actions”
● Choose the Print transactions or Send transactions
How would I Edit Various Invoices in QuickBooks?
● Click on the New+ icon
● Select the Batch Transactions
● From the Transaction Type menu and then choose “Invoices”
● Go to the Action menu and click on the “Modify” button
● Select all the checkboxes for the invoices that you required to modify
● From the Actions fly-out menu, click on the EDIT button
● And you get access to make new changes
How can I Save the Multiple invoices in QuickBooks?
● From the Sales menu, choose the Invoices tab
● Locate and open the Invoice
● From the available options, click on the “Print or Preview” button
● Choose the folder where you need to save the PDF file
● Click on the Save button.
Can PDF invoices be imported into QuickBooks?
There are third-party apps that can import PDFs into QuickBooks. QuickBooks does not offer this feature.
By using CSV format can I import invoices into QuickBooks Desktop?
● You have to go to the Banking tab.
● Then you have to click on the Update drop-down.
●Now you have to select File upload or file to upload and then you have to select the saved .CSV and then click on Next.
● You have to select the account where you have to import from the QuickBooks Account drop-down menu.
● According to your .CSV file format you have to map your fields.
● Then you have to hit on Next and choose the transaction to import
Click on Yes.
● Click Finish once you have received import confirmation. The imported transactions will now be visible in the Downloaded Transactions window under the New Transactions tab.